
How to Set Up a New Printer
Setting up a new printer is easy. Follow these steps to get started.
-
Plug in the Printer
- Connect the printer’s power cable.

- Turn on the printer.
- Connect the printer’s power cable.
-
Connect the Printer to Your Computer
- Use the USB cable that came with the printer.

- If using a wireless printer, follow its setup guide.
- Use the USB cable that came with the printer.
-
Find Printer Settings on Your Computer
- On Windows: Go to the Control Panel.

- On Mac: Open System Preferences.
- On Windows: Go to the Control Panel.
-
Add the Printer
- Click on "Add a Printer."
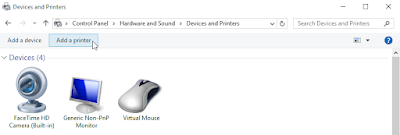
- Follow the on-screen instructions.
- Click on "Add a Printer."
-
Test Your Printer
- Print a test page.
- Press Ctrl + P (Windows) or Command + P (Mac).
- Select your printer and click "Print."


Common Printer Problems and Solutions
-
Printer not working?
- Check if there is paper in the tray.
- Remove any stuck paper.
-
Still not printing?
- Cancel the print job and try again.
- Restart the printer.
-
Faded or light print?
- You may need a new ink cartridge.
- Check the printer manual for the correct cartridge type.
If you still have issues, try finding help for your printer model. Below are support links for common brands:
- Brother
- Canon
- Epson
You can also search on Google. Type your problem along with the printer brand and model. Example: Canon MX920 not responding.

Wireless Printers
Wireless printers do not need cables. They let you print from laptops, tablets, and phones. Follow the manual for setup. If you have trouble, search online for solutions using your printer's brand and model.
Now, you are ready to print! 🎉
No comments:
Post a Comment